CoreXY 3D Printer: Buyer Fit and Inspection Guide
Updated .
A CoreXY printer can be a good buy when the exact machine fits your planned parts, materials, and workspace. CoreXY is a motion layout, not proof that a printer is better. Before choosing, compare the maker's documented build space and material guidance with the job, then check belt access, service access, and the exact model's current documentation. Klipper describes the linked X/Y motor positions as X + Y and X − Y, while Z stays Cartesian (Klipper).
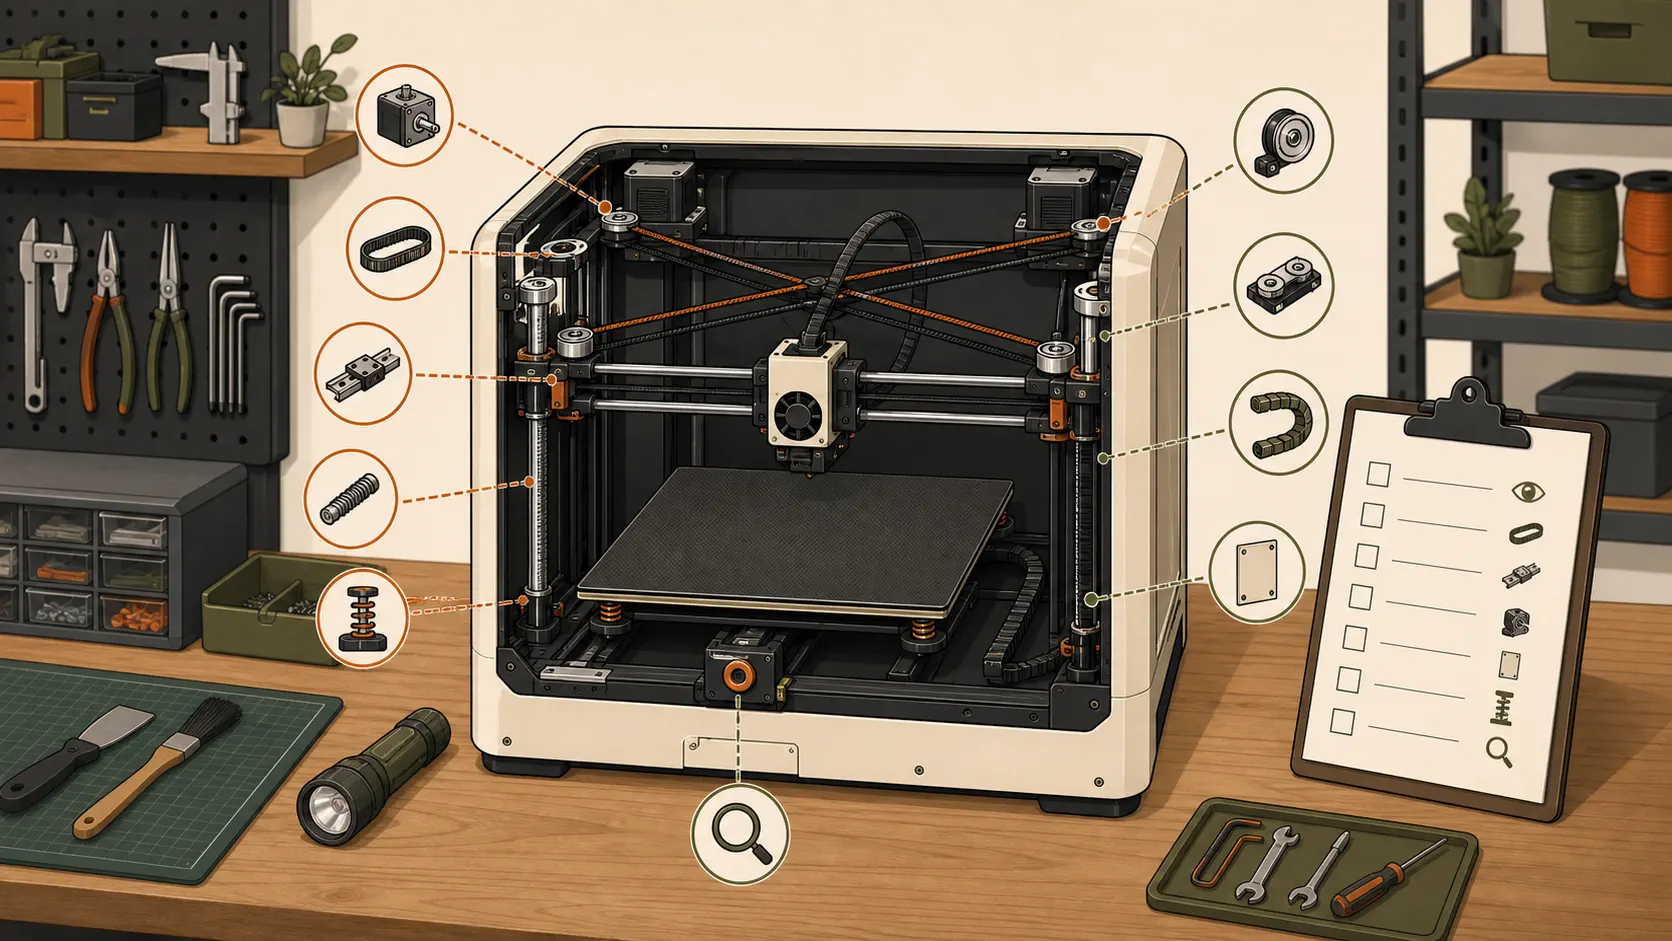
Do not trust a motion claim without proof. Check the belt route and access to each pulley. Check access to the toolhead and bed. Measure the space around the installed machine. Try the enclosure parts that you will handle. Read the maker's documents. Check the proof given for the materials you plan to use.
Ask the seller to show the exact machine. Ask for the care steps and parts list. Also ask for setup, material, emissions, and safety guides. CoreXY is the name of the motion layout (RepRap). It does not tell you if a printer suits your room or work. It also does not tell you if its care fits you.
What is a CoreXY 3D printer?
CoreXY is a Cartesian motion layout with fixed motors in a parallel system. Its belt pattern differs from H-bot routing in the RepRap guide (RepRap). Cartesian means movement along X, Y, and Z lines. X/Y means the two side-to-side lines. CoreXY tells you how the machine makes that X/Y motion (Klipper). Neither guide proves the results of a given printer.
Keep that point in mind on a shop tour. A product page may make the motion layout stand out. Your buy sheet should start with the real job. Write down:
- Your planned filament types. Ask for the maker's stated material match as proof.
- The size of your largest planned part. Compare it with the maker's stated build space.
- The edge of your work area. Check it against the machine size. Include the clearance the maker asks for.
- The noise and handling that you will accept. Check both in a live demo. Do not guess from the CoreXY name.
- The access you need for belts and pulleys. Include the toolhead, bed, filament path, and normal cleaning. Check access with covers and doors in their usual spots.
- The seller's proof and your checks for approval. Write them down before you compare machines.
This sheet belongs to this guide. It is not an industry standard. Are you still choosing a type of printer? Start with the desktop 3D printer guide.
How does CoreXY motion work?
Klipper works out the two X/Y motor positions from the requested Cartesian coordinates. It gives these two equations: stepper_a_position = cartesian_x_position + cartesian_y_position and stepper_b_position = cartesian_x_position - cartesian_y_position. The Z position is the Cartesian Z position (Klipper). A stepper is a motor that moves in set steps. The two paths work as a pair. This link is the main idea. An X or Y order makes both motor and belt paths move together (Klipper). Kinematics means the way the machine parts move.
The equations are not a score for buyers. They show why you should check the belt route. You should also check each pulley, motor response, and care guide. The equations do not prove print speed or size accuracy. They do not prove noise, surface finish, or trust over time. Ask for proof about the full printer you may buy. Do not accept a case based only on its kinematics name.
Editorial buyer check: during a demo, ask the seller to point out both X/Y motors and trace each belt path on the real unit. Compare what the seller shows with the maker's drawing and current inspection procedure.
Is a CoreXY printer better for your workshop?
“Better” needs a clear job and room. Use this table to screen for fit. Then check each answer in the machine's documents or a demo.
| Use case | Evidence to inspect | Fit signal | Reason to pause |
|---|---|---|---|
| Parts within a known envelope | Put planned part sizes by the stated build space. | Each planned part fits in the written check. | A needed size is missing. Or it needs an angle that is not stated. |
| Material-specific projects | Get the maker's match statement for each planned filament. | Each material is in the current guide. It also has handling steps. | The seller only makes a broad “wide material support” claim. |
| Fixed workshop position | Check the size drawing, door swing, spool spot, cable path, and needed clearance. | The full setup stays within your marked edge. | A door, cover, spool, cable, or service task crosses that edge. |
| Shared room | Watch a live demo of start, loading, printing, cooling, and removal. | You can hear the sounds and watch the handling steps. | The choice rests on an adjective, not a demo. |
| Maintenance by the owner | Get the stated steps for the belt, pulley, toolhead, and bed. | You can see and reach each named task as stated. | A normal task cannot be shown. Or its steps are not on hand. |
| Enclosed workflow | Read the enclosure and material guides. | You can check the door, panels, seals, and any stated links. | The enclosure is called proof of emissions control with no proof. |
The sheet may leave a few machine types in play. If so, Run the picker. Bring its short list back to these checks.
Is CoreXY better than Cartesian?
CoreXY is one Cartesian motion layout, so the labels are not opposites. This guide cannot call CoreXY better than every other Cartesian layout. Compare the exact machines on the planned parts, materials, documented build envelope, workspace, maintenance access, and seller evidence.
Is CoreXY better than a bed slinger?
CoreXY is not automatically better than a bed slinger. Compare the exact machines on the same job, documented build envelope, material guidance, workspace limits, maintenance access, and seller evidence. A motion label alone does not decide which complete printer fits.
How much does a CoreXY 3D printer cost, and which is cheapest?
CoreXY covers complete printers, kits, and DIY builds. Their sticker prices are not directly comparable because the included configuration and the remaining work can differ. Do not call a machine cheapest from its headline price.
Make At Home total-cost worksheet: this is an editorial comparison tool, not an industry standard. Use a dated quote or cart for the exact configuration. Enter the amount or mark it unknown for every line:
- Printer or kit.
- Required enclosure or material hardware.
- Shipping and tax, where applicable.
- Tools required for assembly, setup, and the documented service tasks.
- First spares and consumables.
- Setup and service time for the exact configuration.
Keep unknowns visible. Compare candidates only after the same fields have a dated value or an unknown marker.
Which CoreXY printer is best for 2026?
There is no model ranking here. Use this Make At Home editorial selection table to choose a class, then verify the exact machine and configuration.
| Class | Who it fits | Proof required | Reason to pause |
|---|---|---|---|
| Complete enclosed printer | A buyer whose part, material, and workspace plan calls for the offered enclosure. | Current documents for the exact printer, enclosure, materials, build envelope, and service access. | The enclosure claim, access path, or included configuration is unclear. |
| Complete open-frame printer | A buyer whose documented material and workspace plan does not require an enclosure. | Current material guidance, build envelope, installation clearances, and service steps. | The planned material hardware or workspace controls are unresolved. |
| Documented kit | A buyer prepared to assemble and check the supplied configuration. | Exact bill of materials, assembly and setup instructions, current safety guidance, and parts support. | The revision, included parts, tools, or setup evidence is unclear. |
| DIY/open-source build | A builder prepared to define, source, assemble, document, and service the chosen configuration. | A dated design revision, complete parts list, build instructions, and documentation for every selected component and safety claim. | The configuration or responsibility for an open item is undefined. |
A 300x300 or 500x500 search describes a nominal request, not proof that your part fits. As a documented build-envelope inspection, compare the maker's stated build envelope with the part's actual orientation and any excluded area stated for that exact configuration. Do not apply a universal usable-volume rule.
What should you inspect before buying?
Use a showroom visit or video call to gather proof. Ask to see the same model and setup you may buy. Write down what the seller shows.
Showroom or demo inspection checklist
- Editorial buyer check: ask the seller to point out both X/Y motors and trace the belt routes. Match those routes to the maker's drawing and current inspection procedure.
- View the belts and pulleys from spots the maker allows. Note each area that you cannot see.
- Ask for the stated belt check and setup steps. Then ask the seller to show the access path. The machine must be stopped as stated.
- Ask for a demo of toolhead removal or service. Include each cover and fastener that you must handle.
- Ask how to reach the bed for care tasks in the manual. Watch the seller use that access.
- Load and unload your planned filament with the stated steps. Or ask the seller to show them.
- Put a mock-up of your planned part space on the build-area drawing. Note any guess about its angle.
- Open each door, lid, panel, spool holder, and screen that users handle. Use its full shown path. Check that path against your work area's edge.
- Ask for the exact manual version and warranty terms. Ask which parts get used up. Also ask how to get spare parts for this setup.
- Ask for a sample made on the unit in the demo. Its material and settings must be named. Judge only what you can see.
Evidence-request card
Copy this card into an email before your visit:
Candidate and configuration: What exact model, revision, options, firmware, and enclosure are included?
Job fit: What documented build envelope and material compatibility apply to this configuration?
Installation: Please provide the dimension drawing, installation instructions, required clearances, power requirements, and permitted operating environment.
Maintenance: Please provide the current procedures for inspecting or servicing belts, pulleys, toolhead, bed, and user-replaceable parts.
Evidence: Which claims about output, noise, emissions, and material use are supported by documents or a demonstration of this configuration?
Safety: Please provide the current safety instructions, declarations or certifications claimed for the offered unit, and the scope of each document.
Acceptance: Which checks can the seller demonstrate before handover, and what result will be recorded?
How do enclosure and workspace change the decision?
Check the enclosure doors and panels in person. Include the spool spot, cable paths, and care openings. Mark your free width, depth, and height. Mark them on the floor and wall. Ask the seller for a drawing with sizes. Also ask for the clearance the maker needs. Check the full shown path of each part that you will use or remove.
Do not treat “enclosed” as a full answer about emissions. EPA says research has found that 3D printing releases gases and particulates that could pose health risks. These include VOCs, some hazardous when inhaled, and ultrafine particles. EPA also says filament types release different amounts of respirable particles (EPA). VOC means volatile organic compound. An ultrafine particle is a very small bit of matter.
Ask which emissions proof covers the printer, enclosure, and planned filament as one setup. Follow the maker's setup and safety guides. Use the 3D printer enclosure guide to check enclosure claims. Do not assume that a shell alone controls emissions.
Also check where you will handle and store filament. Match the loading path to your reach. Use the filament storage guide for that part of the layout. You may not have picked a support top yet. In that case, use the 3D printer table guide. Make the top a separate choice that you can check.
What maintenance access should you check?
Access depends on the machine, its panels, your hands, and your tools. Stand where the printer would sit. Try only the user tasks in the maker's guide. Do not just ask, “Is maintenance easy?” Ask a clear question. “Can I see and reach the named service point with the stated steps? Can I do so within my work area's edge?”
Ask the seller to show:
- The view and access path for each belt and pulley in the care guide.
- The stated way to reach the toolhead and filament path. Include the parts that users may service.
- The bed access spot used for cleaning or checks in the manual.
- The covers, doors, or panels that move or come off for each named task.
- The spare parts named by the maker. Also ask how to confirm the right version.
- Where to find care steps, firmware notes, and help contacts for the offered model.
Write down blocked views and hard reaches. They are facts about your setup. Do not fill any gap with a guess from another CoreXY machine.
What is illegal to print on a 3D printer?
This buyer guide cannot determine whether an object is legal to print. The answer depends on the jurisdiction, the exact object, the rights attached to its design, and its intended use. Ask the relevant official local authority before printing when legality is in question. This is not legal advice.
Which safety evidence belongs in the buying decision?
Safety proof should match the exact printer and setup. Ask for the maker's current setup and use guides. Get its care and material guides too. A seller may cite a statement, certificate, or test report. They may cite a sensor, interlock, filter, or alarm. Ask for the document in each case. Check the model name it covers and the stated scope. A feature name cannot replace that proof.
EPA's research supports questions about gases and particulates from your planned setup. It names VOC and ultrafine-particle emissions from 3D printing. It also says filament types can differ in respirable-particle emissions (EPA). This is broad proof. Do not turn it into a claim about one printer. Ask that printer's maker for proof that applies. Follow its steps.
Stop and verify checklist
Pause the decision if any of these statements is true:
- The offered model or setup does not match the name on the given document.
- A claim about performance, noise, emissions, or safety has no document. It also lacks a set test or a demo you can watch.
- The belt route or service access in the demo goes against the maker's current steps.
- Your planned material is not in the maker's match guide.
- You cannot check the installed space with the doors and panels in use. Or the check leaves out spool handling, cables, or stated service access.
- The seller cannot point to the current use and care steps for the offered unit.
- An enclosure is given as emissions proof. Yet no document says what was checked.
- A result for approval rests on a vague word. It does not rest on a feature you can see or a saved check.
Is CoreXY worth it for your use case?
Keep a machine on your short list when it meets all your needs. It must fit your part space and planned materials. It must fit your work area's edge. Its handling and care access must suit you. Its proof must meet your needs and pass your checks. Do not choose it from the motion name alone.
Put your full sheet next to the seller's documents. Circle each open item. You may see the right feature yourself. Or the maker may give a clear answer. A pass based on such proof gives you a sound reason to go on. A pass based only on the sound of “CoreXY” does not. Your choice is not done.
Run the picker to narrow the type of gear. Then use this check sheet on each machine that you can test. You can also browse the machine directory. Do not treat a type page as proof about one printer.
Written by Tileo, operator of Make At Home.