3D printer table: check the setup before you buy or build
The best 3D printer table is a stable support that fits the entire working setup, not only the printer's feet. Check the printer and accessories as one load. Map every moving part, lid, door, spool, cable, and waste path. Confirm that the table has a published capacity that applies to the intended use. Keep controls and service points within reach. For fire-related questions, rely on the exact printer, enclosure, and furniture documentation. A table name, cabinet, slab, or set of locking wheels does not establish a fire rating. If any check lacks enough information, keep shopping or revise the build.
My editorial verdict is to choose by documented fit, not by a "3D printer table" label. This guide uses a Make At Home rubric built around mass, footprint, motion, access, and documentation. It is a purchasing and layout tool, not an industry standard or a record of hands-on furniture tests.
A printer can fit while parked and still fail the layout when its bed moves, its lid opens, or its spool needs replacement.
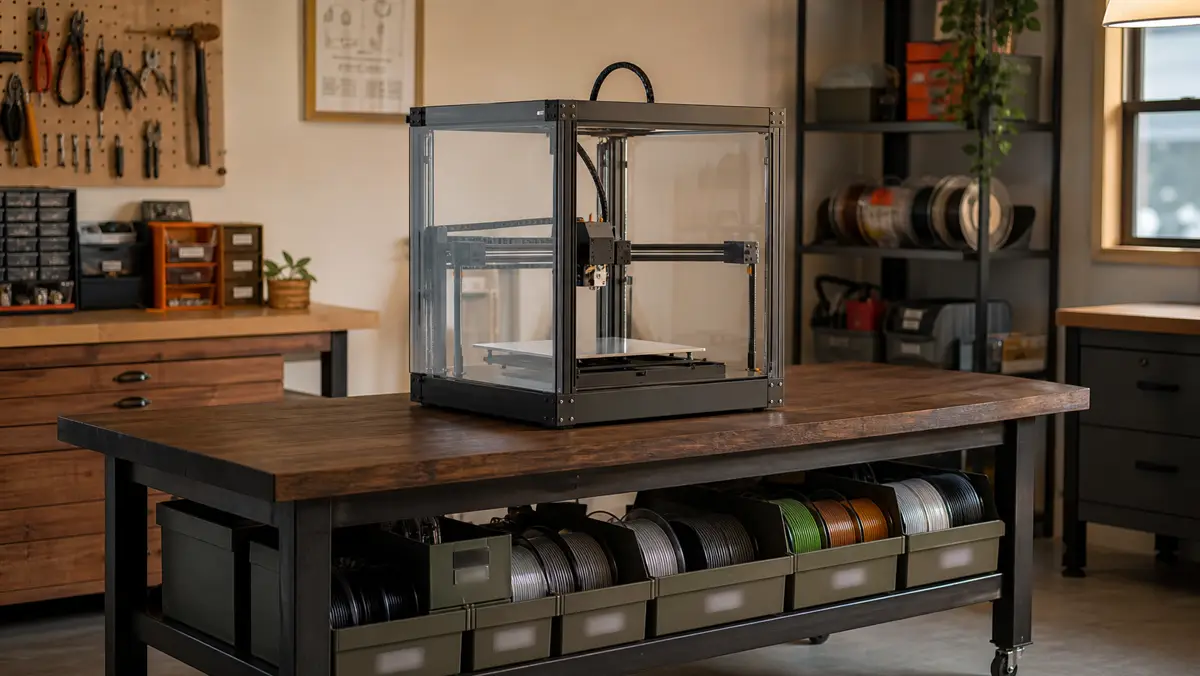
What is the best table to hold a 3D printer?
The best table is the smallest support that passes every check for your exact printer setup. "Smallest" refers to the usable top, not the dimensions in a product title. The frame, raised edges, shelves, wall position, and stored tools can all reduce usable space.
Start with the complete station. Include the printer, spool system, tools that remain on the table, enclosure if used, cable routing, and any documented waste path. Then compare the station with the furniture documentation.
Use this table to reject weak candidates before appearance or storage decides the purchase:
| Table type | When it belongs on the shortlist | What you must verify | Common reason to reject it |
|---|---|---|---|
| Existing desk | You want to reuse furniture in a shared room | Usable top, applicable load capacity, stability, and access | No published capacity, or drawers and walls reduce usable depth |
| Fixed workbench | The printer gets a dedicated station | Top dimensions, capacity wording, frame position, and service room | Stored tools take over the printer's working area |
| Mobile cart | The station must move | Shelf dimensions, total and shelf-specific load wording, caster instructions, and parked stability | A shelf fits the feet but not the working footprint |
| Cabinet setup | You need storage or a surround in the same layout | Every table check plus the printer and accessory documentation that applies to the enclosed layout | Panels block motion, access, cables, or a documented path |
| DIY table | A standard product does not fit the room or workflow | Finished dimensions, materials, joints, load assumptions, and access | The plan solves a different printer or room |
A pairing to check: ELEGOO Neptune 4 and Seville Classics UltraHD 60-inch workbench
Seville Classics lists assembled dimensions of 60 inches wide by 24 inches deep, inner dimensions of 50 inches wide by 22.75 inches deep, and a total weight capacity of 2,000 pounds evenly distributed. The page does not publish a point-load or per-zone rating, so the evenly distributed total does not approve four printer feet. ELEGOO lists a net weight of 8.3 kg, a machine size of 475 by 445 by 515 mm, and a maximum machine activity size of 475 by 550 by 735 mm.
The activity envelope is about 18.7 by 21.7 by 28.9 inches, while the bench inner top is 50 by 22.75 inches. Comparing the 21.7-inch activity depth with the 22.75-inch inner depth leaves about 1.05 inches before cables or other access needs (ELEGOO, Seville Classics). Verify the exact surface and clearances before choosing this pairing. These published figures do not establish universal suitability.
Use the picker to apply the stability, footprint, load, and access checks to your shortlist. Run the picker →
Commercial listings can help you see what to verify, but the category name proves little. One current listing describes a printer stand as a "3-tier" workbench and gives dimensions of "39.4 x 23.7 x 28.4in" in its title. Those figures still need comparison with the full working setup, and the supplied excerpt does not establish a usable-top size or a fire rating (Amazon product listing).
What table do you use for a 3D printer?
Use the table type that matches what happens before, during, and after a print. A fixed workbench suits a station that stays assembled. An existing desk can work when its documentation and usable area pass the same checks. A cart belongs in the shortlist only when movement is part of the real workflow.
Write down these facts before you choose a type:
- Where the printer stays while it operates.
- Which parts move beyond the parked body.
- Where the spool, cables, controls, and waste path sit.
- Which doors, lids, panels, or plates you must remove.
- What remains on the support during use.
- Which capacity and use conditions the furniture maker publishes.
- Which printer, enclosure, and furniture documents govern fire-related placement.
Do not substitute a community favorite for this list. A Reddit thread about suitable tables and a Bambu Lab community discussion can reveal layouts that other owners considered, but each remains user-generated discussion rather than product documentation (Reddit discussion, Bambu Lab community discussion).
Copy the question, not the answer: ask why a layout worked for its owner, then check whether the same condition exists in your room.
Which dimensions matter for a 3D printer table?
The useful dimension is the printer's full activity envelope plus the access your documented tasks require. A parked footprint is only the starting outline.
Draw the layout from above and from the side. Mark the following zones:
- Every printer foot and support point.
- The farthest position of each documented moving part.
- The path for the spool or material feed.
- The opening path for each lid, door, drawer, or enclosure panel.
- The cable and power-connector path.
- Any waste or purge path documented for the model.
- The hand space needed to reach controls and remove serviceable parts while the printer is powered off.
Measure the usable top itself. A product's overall width and depth may include a frame, handle, raised lip, or structure that the printer cannot occupy. If the seller gives only overall dimensions, the footprint check remains open until you can establish the usable area.
Repeat the drawing at the intended wall position. A deep tabletop does not help if the wall blocks a cable, spool, door, or moving component. Do not add a universal clearance value. This packet provides none, and model documentation can define different paths.
How do you check whether a table can carry the printer?
Compare the complete station with a published capacity whose wording fits the way the load sits on the table. Start with the printer's documented mass. Add every item that stays on the support. Label any value you measured or estimated yourself.
Use this worksheet:
| Load item | Source of the value | Included in total? | Where the load sits |
|---|---|---|---|
| Printer | Current printer documentation | Yes | Printer feet or specified support points |
| Spool or feed system | Product documentation or your labeled measurement | If kept on the table | Stand, holder, or printer mount |
| Enclosure | Enclosure documentation or your labeled measurement | If supported by the table | Frame perimeter or feet |
| Tools and stored material | Your labeled measurement | If they remain during use | Shelf or tabletop zone |
| Added slab or mat | Product documentation or your labeled measurement | Yes | Under the printer or enclosure |
Then read the furniture wording. A total capacity does not automatically answer a per-shelf, point-load, or concentrated-load question. "Evenly distributed" is a condition, not decoration. If the intended load pattern falls outside the published wording, ask the manufacturer or reject the candidate.
Do not use table weight as a substitute for table capacity. This guide establishes no mass threshold for a good support. It also makes no claim that extra weight improves print quality.
How do you account for printer motion and table wobble?
Treat motion as a fit problem first and use a modest rocking check only as an editorial reject test. The check below does not measure vibration, print quality, structural capacity, or safety.
Assemble the empty furniture according to its instructions and place it on the intended floor. Press gently at each corner. If a foot lifts or the frame shifts, use only adjustments or fixes allowed by the furniture documentation. Reject the table if the permitted steps do not resolve the movement.
Next, place the powered-off printer in its proposed position. Confirm that every intended support point remains on the usable top. Move only the parts that the printer documentation allows you to move while powered off. Check doors, lids, plate removal, spool loading, cables, and waste access.
Passing a corner press does not prove that a table is safe or that prints will improve. It only removes an obvious rocking candidate from this editorial shortlist.
When does a 3D printer table with storage help?
Storage helps only when it stays outside the working and service zones. Shelves can keep material and tools off the tabletop. Drawers and cabinets can also consume leg room, block rear access, or invite items into a moving path.
Check a storage layout in this order:
- Draw the full activity envelope.
- Mark access, cable, feed, and documented waste paths.
- Place storage only in the remaining area.
- Add stored items to the relevant load calculation.
- Recheck the layout with doors and drawers open.
An enclosed cabinet needs a separate documentation check. Do not treat ordinary furniture panels as a printer enclosure or as evidence of ventilation, containment, or fire performance. Accept those claims only when the exact product documents support them.
Should you build a DIY 3D printer table?
Build one when custom dimensions solve a measured constraint and you can document the finished support. DIY is a design choice, not a shortcut around load, stability, access, or safety documentation.
The project "A Simple 3D Printer Table" is one example of a maker-built table, not proof that its dimensions or construction fit another setup (Instructables project). Before you copy any plan, compare its assumptions with your printer, room, materials, joints, and intended load.
Keep a build sheet with:
- The finished usable width, depth, and height.
- The printer's parked footprint and activity envelope.
- The location of support points and stored loads.
- The materials and joints used in the finished build.
- The access paths that must remain open.
- The exact documents used for electrical and fire-related placement decisions.
If you cannot support a load or safety claim, leave it out. A custom table can still be useful without claiming a rating that the plan does not establish.
How should you arrange a table for multiple 3D printers?
Treat each printer as a separate cell, then test the shared table as one loaded system. Do not merge activity envelopes just because the machines share a bench.
For each cell, mark the printer footprint, moving parts, access paths, material feed, cables, and documented waste route. Reject any overlap that blocks a required movement or service action. Then add the complete loads and compare the sum with the furniture's published capacity and distribution conditions.
Shared tools and material need their own zones. Put them in the remaining space only after every printer cell passes. If a machine must move so that another can be loaded or serviced, the layout has failed the access check.
What is the final 3D printer table checklist?
Buy or build only after the same candidate passes every line below. A strong result is a documented fit with no open assumption hidden behind a product label.
- The usable top contains every support point.
- The full activity envelope remains clear.
- Doors, lids, plates, controls, cables, feed paths, and documented waste paths remain accessible.
- The complete station fits the applicable published capacity and distribution wording.
- The empty table does not rock after permitted assembly adjustments.
- Storage remains outside motion and service zones.
- A mobile setup passes the checks in its parked position and follows its caster instructions.
- Fire-related placement follows the exact documentation for the printer, enclosure, furniture, and other products in the setup.
- Unsupported performance, vibration, containment, and fire-rating claims have been removed from the decision.
FAQ
Can I put a 3D printer on a normal desk?
Yes, only if it passes the same checks. Among the pages verified for this guide, the workbenches and cart publish load lines; no specific generic desk model did.
Are locking wheels enough for a printer cart?
No. Locking casters address rolling while parked; they do not fix a shelf that is too small.
Is a heavier table always better for a 3D printer?
No mass threshold is established here. Prefer furniture with a published load line and a top that clears the activity envelope. Add slabs or weights only if the furniture documentation allows them and the new total still fits the published wording.
Written by Tileo, operator of Make At Home.